***Disclosure: This post contains an Amazon affiliate link that at no additional cost to you, I may earn a small commission when you purchase through the link from my blog. Thank you for your support!
Rainy days bring more than puddles. Sometimes the sidewalks start to wiggle. Worms appear from the soil, exploring the surface world for a moment before returning underground. This playful read-aloud helps students notice how weather affects the living things around us.
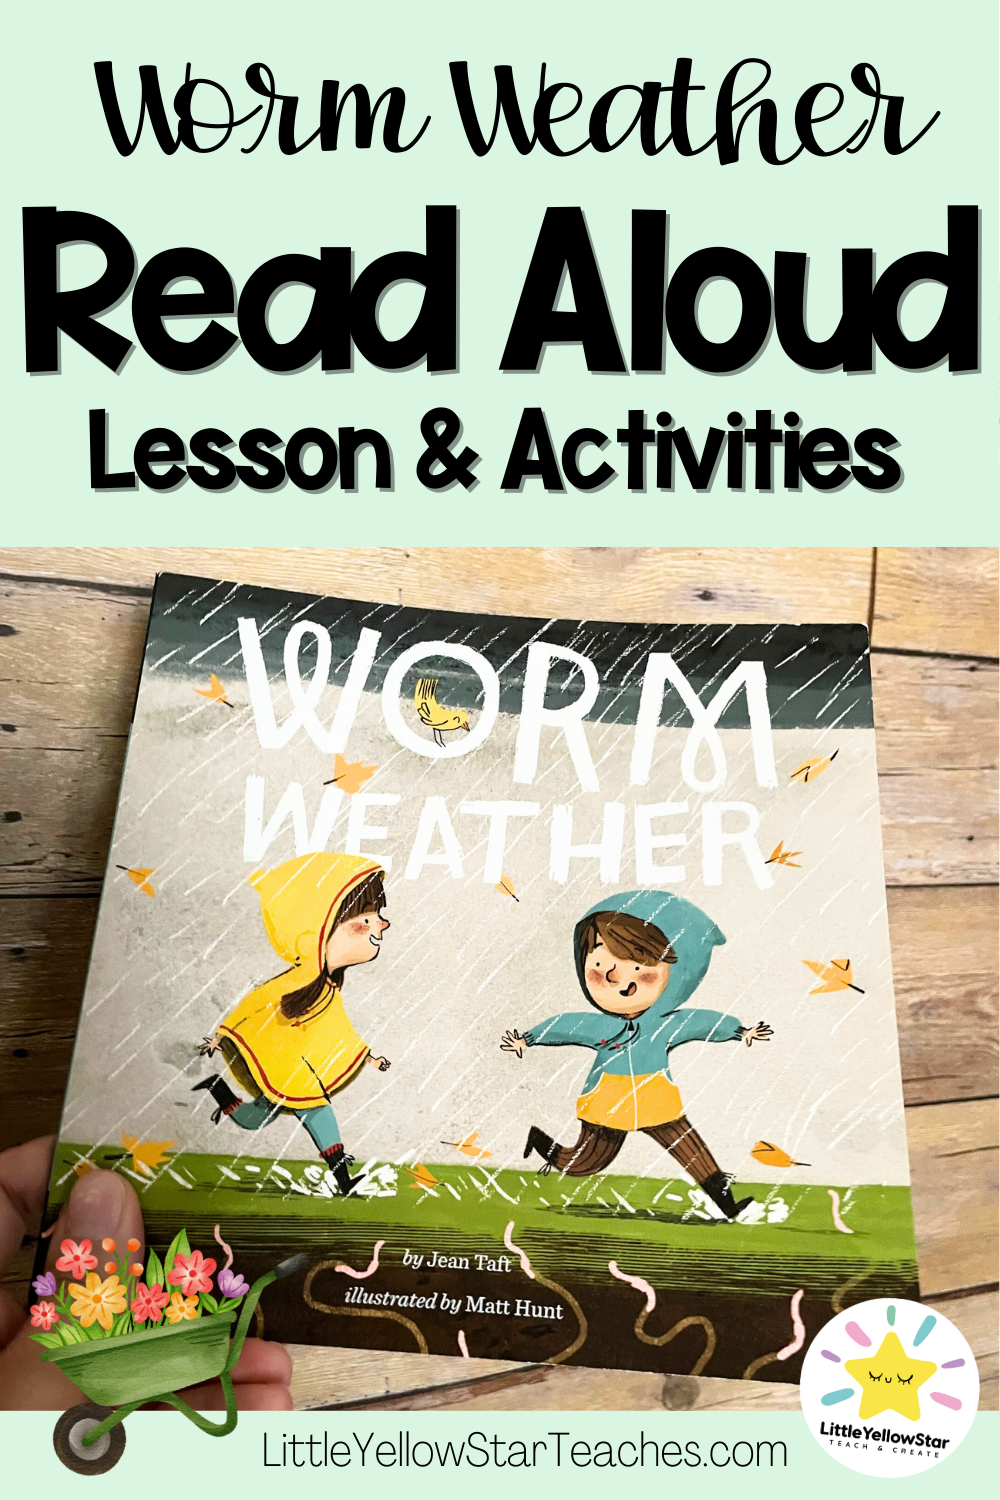
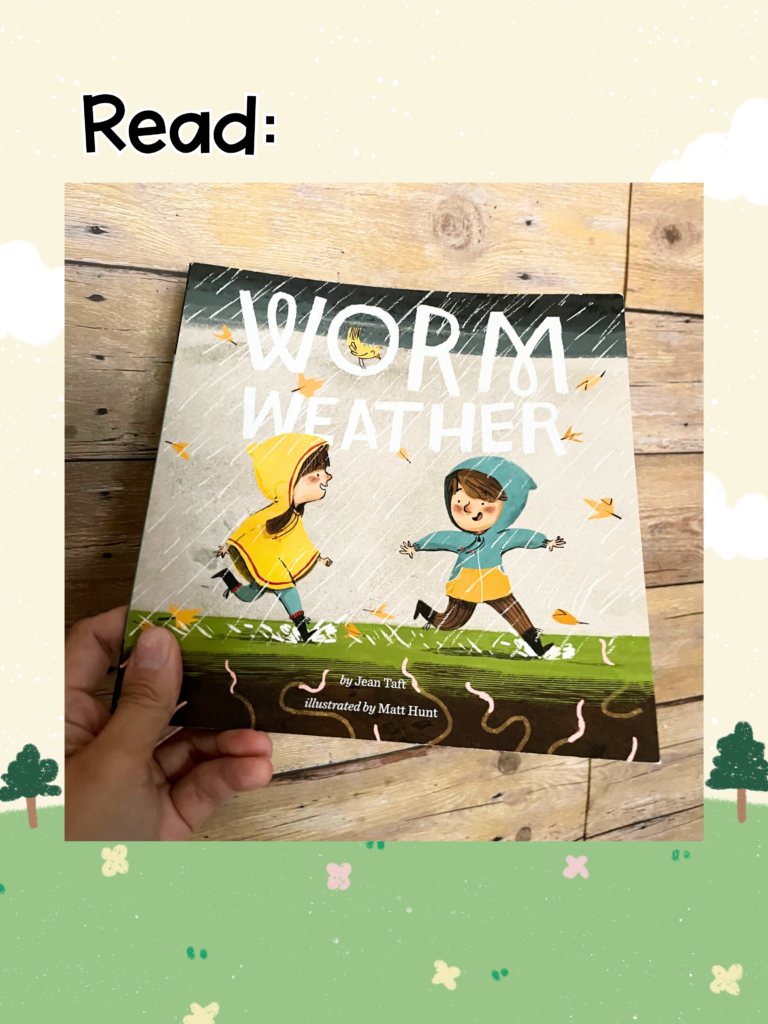
Today I’m sharing how to use Worm Weather by Jean Taft** to explore rainy weather, soil ecosystems, and the important role worms play in healthy gardens.
“Worm Weather” Overview
Worm Weather captures the excitement of a rainy day through rhythmic text and cheerful illustrations. As rain falls, worms appear on sidewalks and children explore the outdoors.
The story offers a fun introduction to weather, soil life, and how small creatures like worms help the environment.
Read-Aloud Lesson Plan: Rain & Soil Life
Objective: Students will explain how rain affects worms and soil and describe why worms are important for gardens.
Pre-Reading
Show the cover and invite predictions.
Questions to Ask:
- What do you notice about the weather in the picture?
- Have you ever seen worms after it rains?
- Where do you think worms usually live?
During Reading
Pause to notice weather changes and worm behavior.
Questions to Ask:
- What happens to worms when it rains?
- Why do worms come up to the surface?
- What changes in the environment during rain?
- How do the children interact with the worms?
Encourage students to describe what happens to the soil and the worms.
Post Reading
Reflect and connect learning.
Questions to Ask:
- Why is rain important for the soil?
- How do worms help gardens grow?
- What should we do if we see worms on the sidewalk?
- How does weather affect living things?
Create an anchor chart:
Rain → Soil → Worms → Healthy Plants
Grab these free resources to make your teaching life easier!

🌸 Spring Wreath for Kids – Collaborative Class Craft & Writing Activity
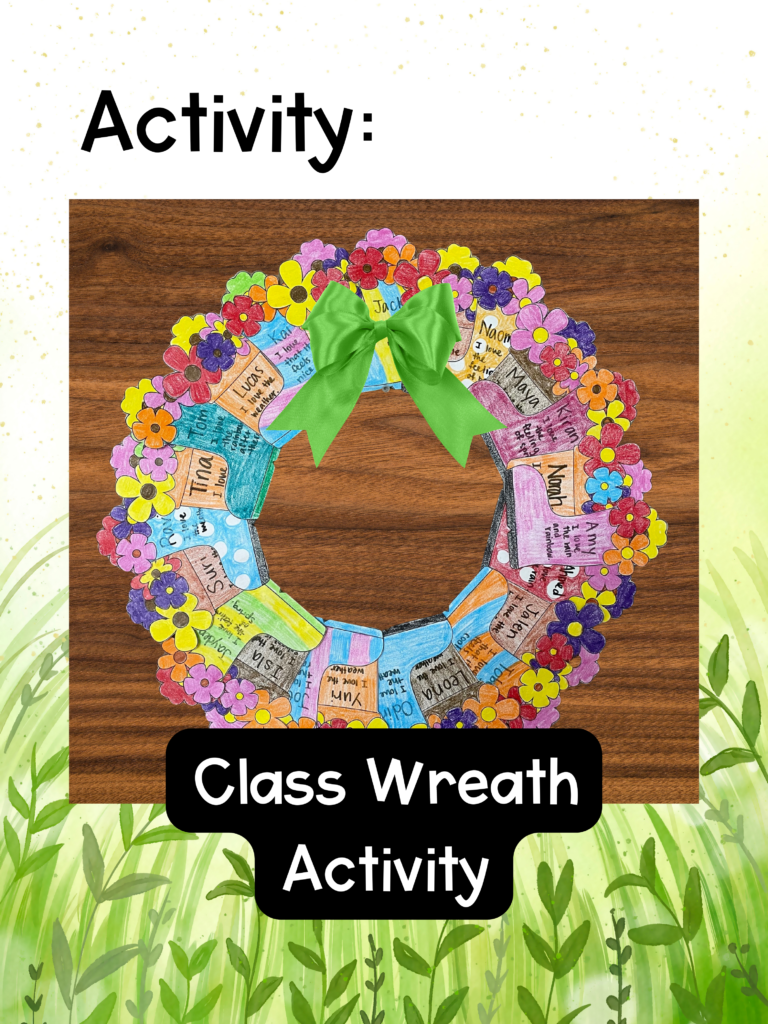
In this activity, students work together to create a large collaborative spring wreath. Each student contributes a small piece of the wreath, such as a flower, leaf, butterfly, or flower pot, and writes something they know about spring. Their ideas might include signs of spring, things that grow in spring, animals that appear in spring, or activities people enjoy during the season.
When all the pieces are collected and assembled, the class creates a beautiful Spring Wreath Display that celebrates both creativity and learning about the season.
This activity encourages collaboration, seasonal observation, writing practice, and classroom community.
Materials Needed:
- Large construction paper or poster board (for the wreath base)
- Green paper strips or pre-cut wreath template
- Student element templates (flower pots)
- Pencils
- Markers, crayons, or colored pencils
- Scissors
- Glue
- Chart paper for brainstorming
- (optional) Spring craft templates
- (optional) Spring Wreath classroom craft resource
Instructions:
- Introduce the Spring Theme: Begin by discussing the signs of spring with students. Ask questions about what changes they notice outside during the season. Talk about flowers blooming, animals becoming more active, warmer weather, and new plants growing. Record student ideas on chart paper to create a class list of spring observations.
- Introduce the Class Wreath Project: Explain that the class will work together to create a large spring wreath. Each student will decorate one small element that will become part of the wreath. Their piece will include a drawing and a short sentence about spring. For example, students might write about flowers blooming, butterflies flying, rain helping plants grow, birds building nests, or warmer weather returning.
- Create Student Wreath Pieces: Give each student a spring element template such as a flower pot, flower, leaf, butterfly, or raindrop. Students write their spring sentence on the template and decorate it with markers, crayons, or colored pencils. Encourage them to use bright colors and creative designs that represent spring.
- Assemble the Class Wreath: Create a large circular wreath base using green construction paper strips or a printed wreath template. Once students finish their pieces, gather the decorated elements and glue them around the wreath. Arrange the pieces evenly so the wreath becomes colorful and balanced.
- Display the Spring Wreath: Hang the finished wreath on a classroom wall or bulletin board with a title such as “Signs of Spring – Our Class Wreath.” Allow students to walk around and read the ideas their classmates wrote about spring.
Differentiation:
- For Emerging Writers:
- For emerging writers, provide simple sentence starters such as “In spring I see…” or “One sign of spring is…”. Students can also draw and label their ideas if writing is still developing.
- For On-Level Writers:
- For on-level writers, encourage students to write a complete sentence describing their spring observation and add details to their illustration.
- For Advanced Writers:
- For advanced writers, challenge students to write two sentences or include descriptive words to explain their idea about spring.
- For Multilingual Learners:
- For multilingual learners, provide picture examples of spring elements and allow students to share their ideas orally before writing. Partner discussions can also help students brainstorm their sentences.
This Spring Wreath for Kids activity works well as a seasonal classroom craft, collaborative writing activity, and spring bulletin board display. The finished wreath becomes a beautiful reminder that every student contributed their ideas to create something special together.
📌 Remember, you can pin this blog post for future reference.
🌱 Plant Observation Kit – Hands-On Plant Science Activity for Kids
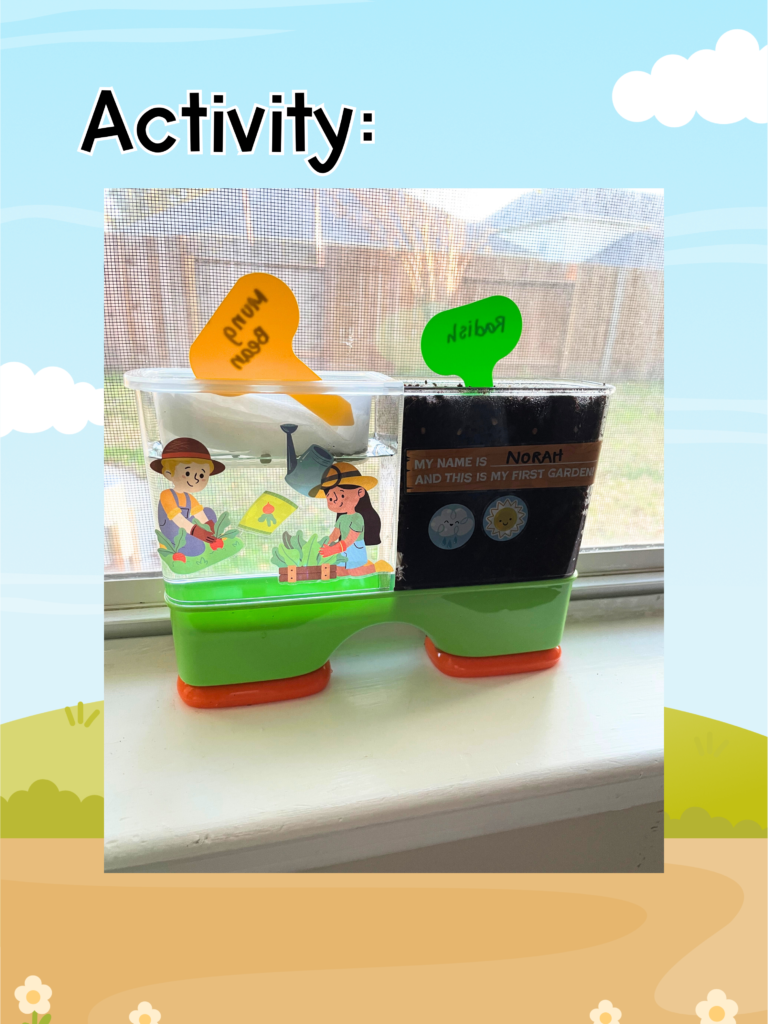
In this activity, children explore how plants grow by using a plant observation kit with a clear root viewer. As seeds sprout and grow, kids can watch the roots stretch and develop beneath the soil. This simple science activity helps children learn about plant growth, patience, and observation.
This activity is perfect for parents to do together with their children at home, turning planting into a fun learning experience. Watching the plant grow over time encourages curiosity and conversation about nature and how plants survive.
The kit allows children to observe root development through a transparent window while seeds grow in soil or water, helping them see plant growth step-by-step.
Materials Needed
- Klever Kits 2‑in‑1 Root Viewer & Planting Science Kit
- Water
- A sunny window or bright area for the plant to grow
This type of kit usually includes seeds, soil, and a clear viewer that lets children watch roots grow underground, making plant growth easy to observe.
Instructions
- Set Up the Plant Kit
- Follow the instructions included in the kit to prepare the planter. Add soil or water depending on the method you choose, and place the seeds inside the container.
- Place the Kit in a Sunny Spot
- Find a bright window or sunny location where the plant can receive sunlight. Plants need light and water to grow.
- Water and Care for the Plant
- Help your child water the plant as needed. This is a great opportunity to talk about what plants need to survive, such as sunlight, water, air, and soil.
- Observe the Plant Growing
- Over the next few days, encourage your child to look closely at the clear viewing window. They can watch seeds sprout and see roots grow beneath the soil.
- Talk About What You Notice
- Ask your child questions about what they see. For example:
- What do the roots look like?
- How does the plant change each day?
- Why do you think plants need roots?
- Ask your child questions about what they see. For example:
This plant observation activity is a fun way for families to explore science, nature, and plant growth together at home. It encourages curiosity while helping children develop observation skills.
Cross-Subject Integration:
- 🌱 Science: Go outside for a short spring walk and record signs of spring.
- 🎨 Art: Paint spring scenes using bright colors.
- 💬 SEL: Discuss how noticing small changes can make us feel calm and happy.

Final Thoughts
Worm Weather reminds students that even a rainy day can be full of discovery. Beneath our feet, worms are quietly helping soil stay healthy and gardens grow strong.
I’d love to see your Soil & Worm Habitat Diagrams! Tag me on Instagram @LittleYellowStarTeaches so I can celebrate your young nature explorers.
Here’s to rainy days and curious minds. 🌧️
Prima at LittleYellowStar
* * *

Other Blog Posts That You Might Enjoy:
- 15 Minutes Daily Social And Emotional Learning Activities For The Classroom (SEL Made Easy)
- How To Offer Growth Mindset Praise Effectively
- 3 Activities To Introduce Growth Mindset